

How to run PHPUnit tests in PhpStorm

PhpStorm comes with built-in support for PHPUnit, but it can be a bit of a hassle to set up – especially if it’s been a while since you last went through the whole process. This guide probably won’t fix that, but at least you’ll know how you can get it to work!
Before we start…

Make sure that:
-
you’ve created or checked out a Composer-based PHP project;
-
have installed its dependencies using
composer install; and -
have opened the project in PhpStorm.
Running tests from a terminal
This tutorial teaches you how to set up PHPUnit within PhpStorm.
But just to be clear, you don’t have to run tests via PhpStorm’s graphical user interface (GUI). You can also simply run the following command from your project directory by opening the Terminal view in PhpStorm or via a terminal emulator of your choice:
This lets you do anything that can also be done via the GUI, and more!
Many people prefer using the GUI however. This is perfectly fine: you should use whatever you feel most comfortable with!
Running tests from PhpStorm
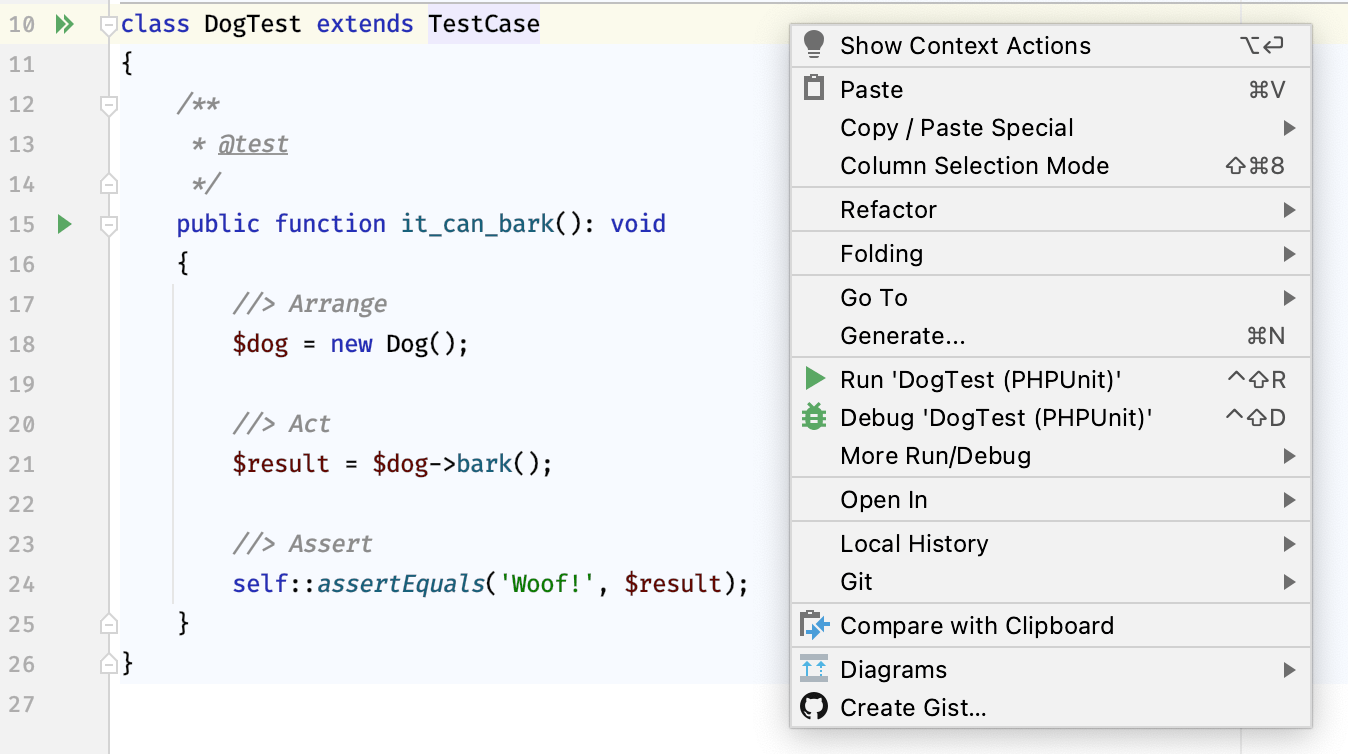
First try to run the tests. You can run do this by right-clicking the , a test class or test method, and selecting the “Run” option.
If that works, this tutorial is not for you.
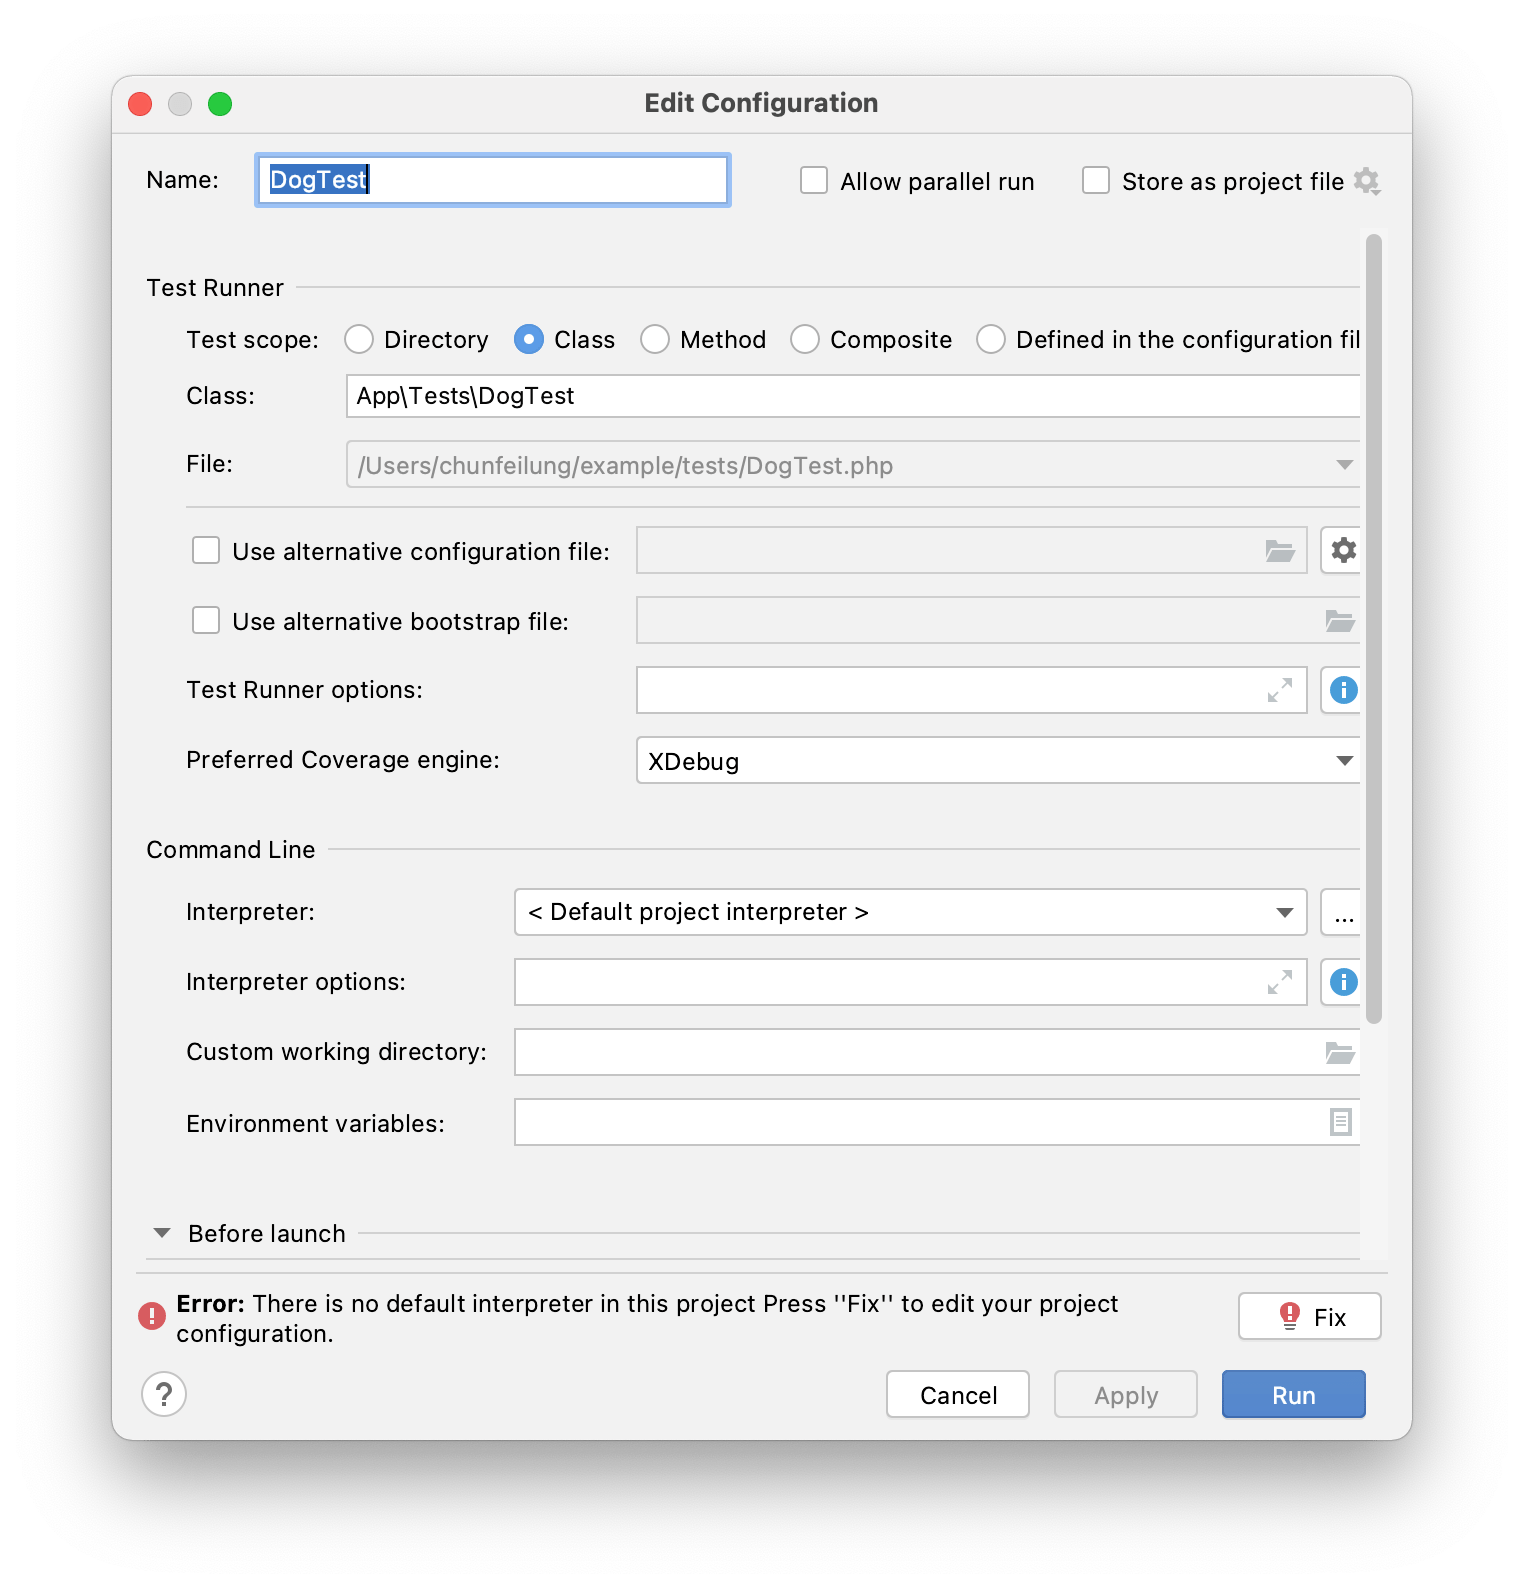
Otherwise, you may see a window that looks very similar to the one below. Press “Fix” to edit your project configuration.
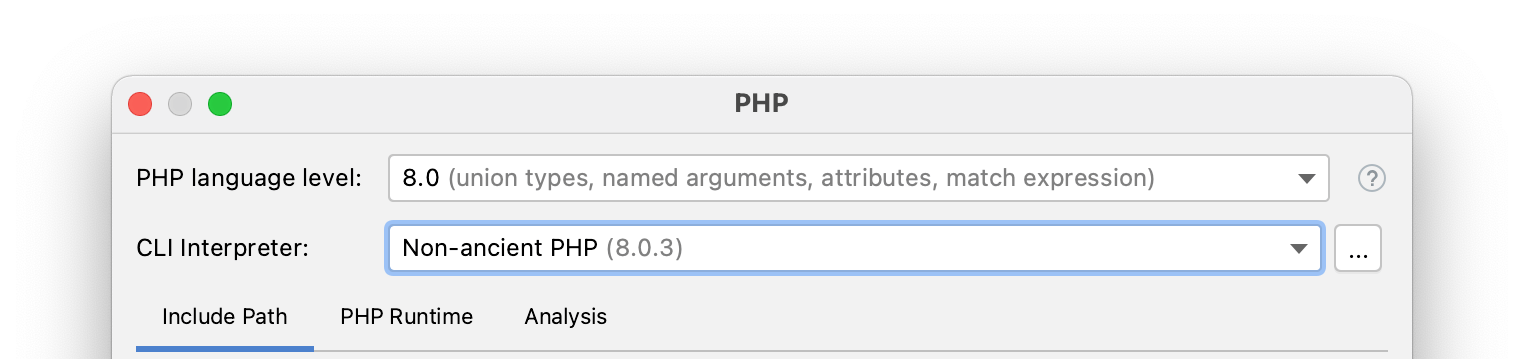
PhpStorm will show you a screen that lets you select a PHP language level and a CLI interpreter.
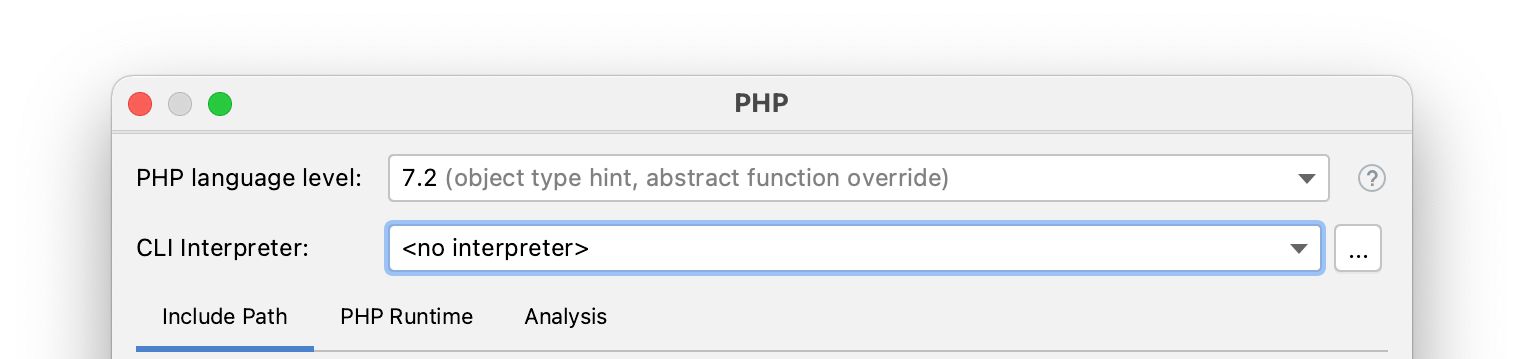
Select an appropriate PHP language level (e.g. 8.0) and the CLI interpreter that supports the chosen language level.
Skip to the end if you can select an appropriate CLI interpreter here. Otherwise, continue with the step below.
Configuring a CLI interpreter
Press the ellipsis button (…) to the right of the “CLI Interpreter” dropdown to add a new CLI interpreter. This opens a new window that lists all interpreters that have been added to your PhpStorm projects.
Press the plus button (+) to add a new CLI interpreter. PhpStorm will show you a list of available interpreters.
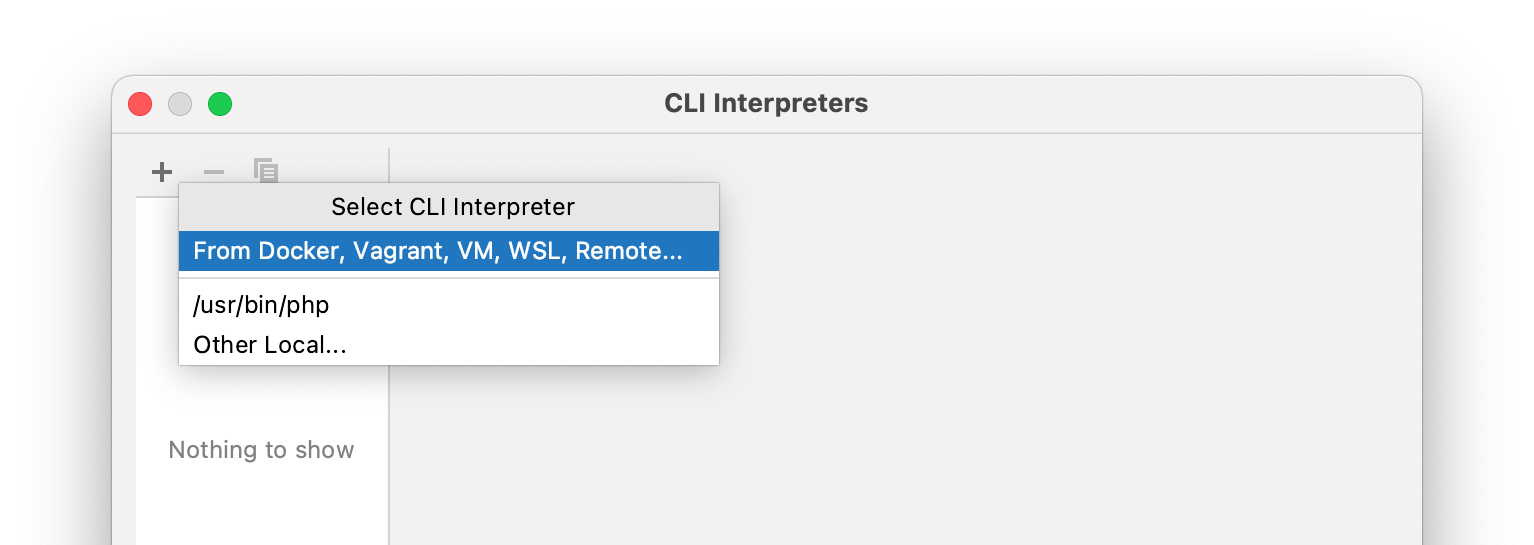
If your project runs , select the first option.
Otherwise select “Other Local…” if you have another PHP version installed on your local machine. This includes PHP versions that were installed via a package manager, like Homebrew.
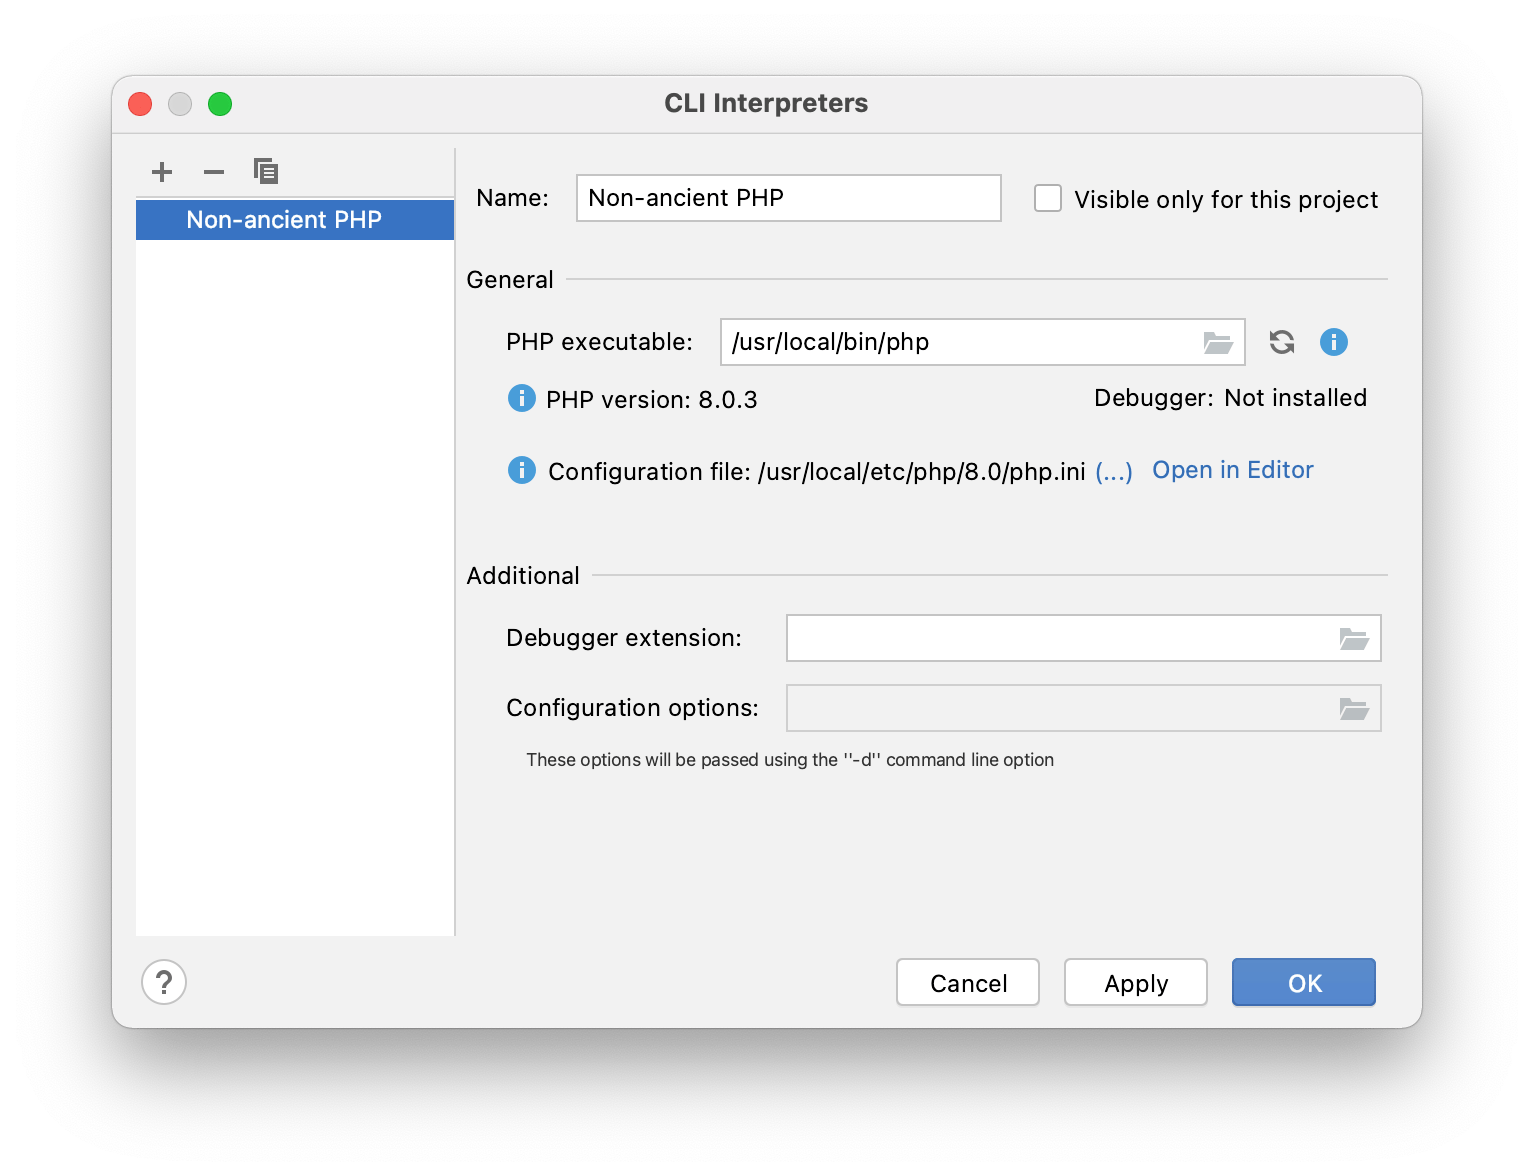
The screenshot above shows what you see when you select “Other Local…”. This window lets you enter a descriptive name of your choosing and tell PhpStorm where it can find the PHP executable.
In this example I named it “Non-ancient PHP” and told PhpStorm that it’s located
at /usr/local/bin/php.
If you have entered a valid path to a PHP executable, PhpStorm will show the version number and whether the chosen PHP version includes a debugger.
Press “OK” to save your changes and return to the previous screen. Select your newly created CLI interpreter and press “OK” again.
Wrapping up
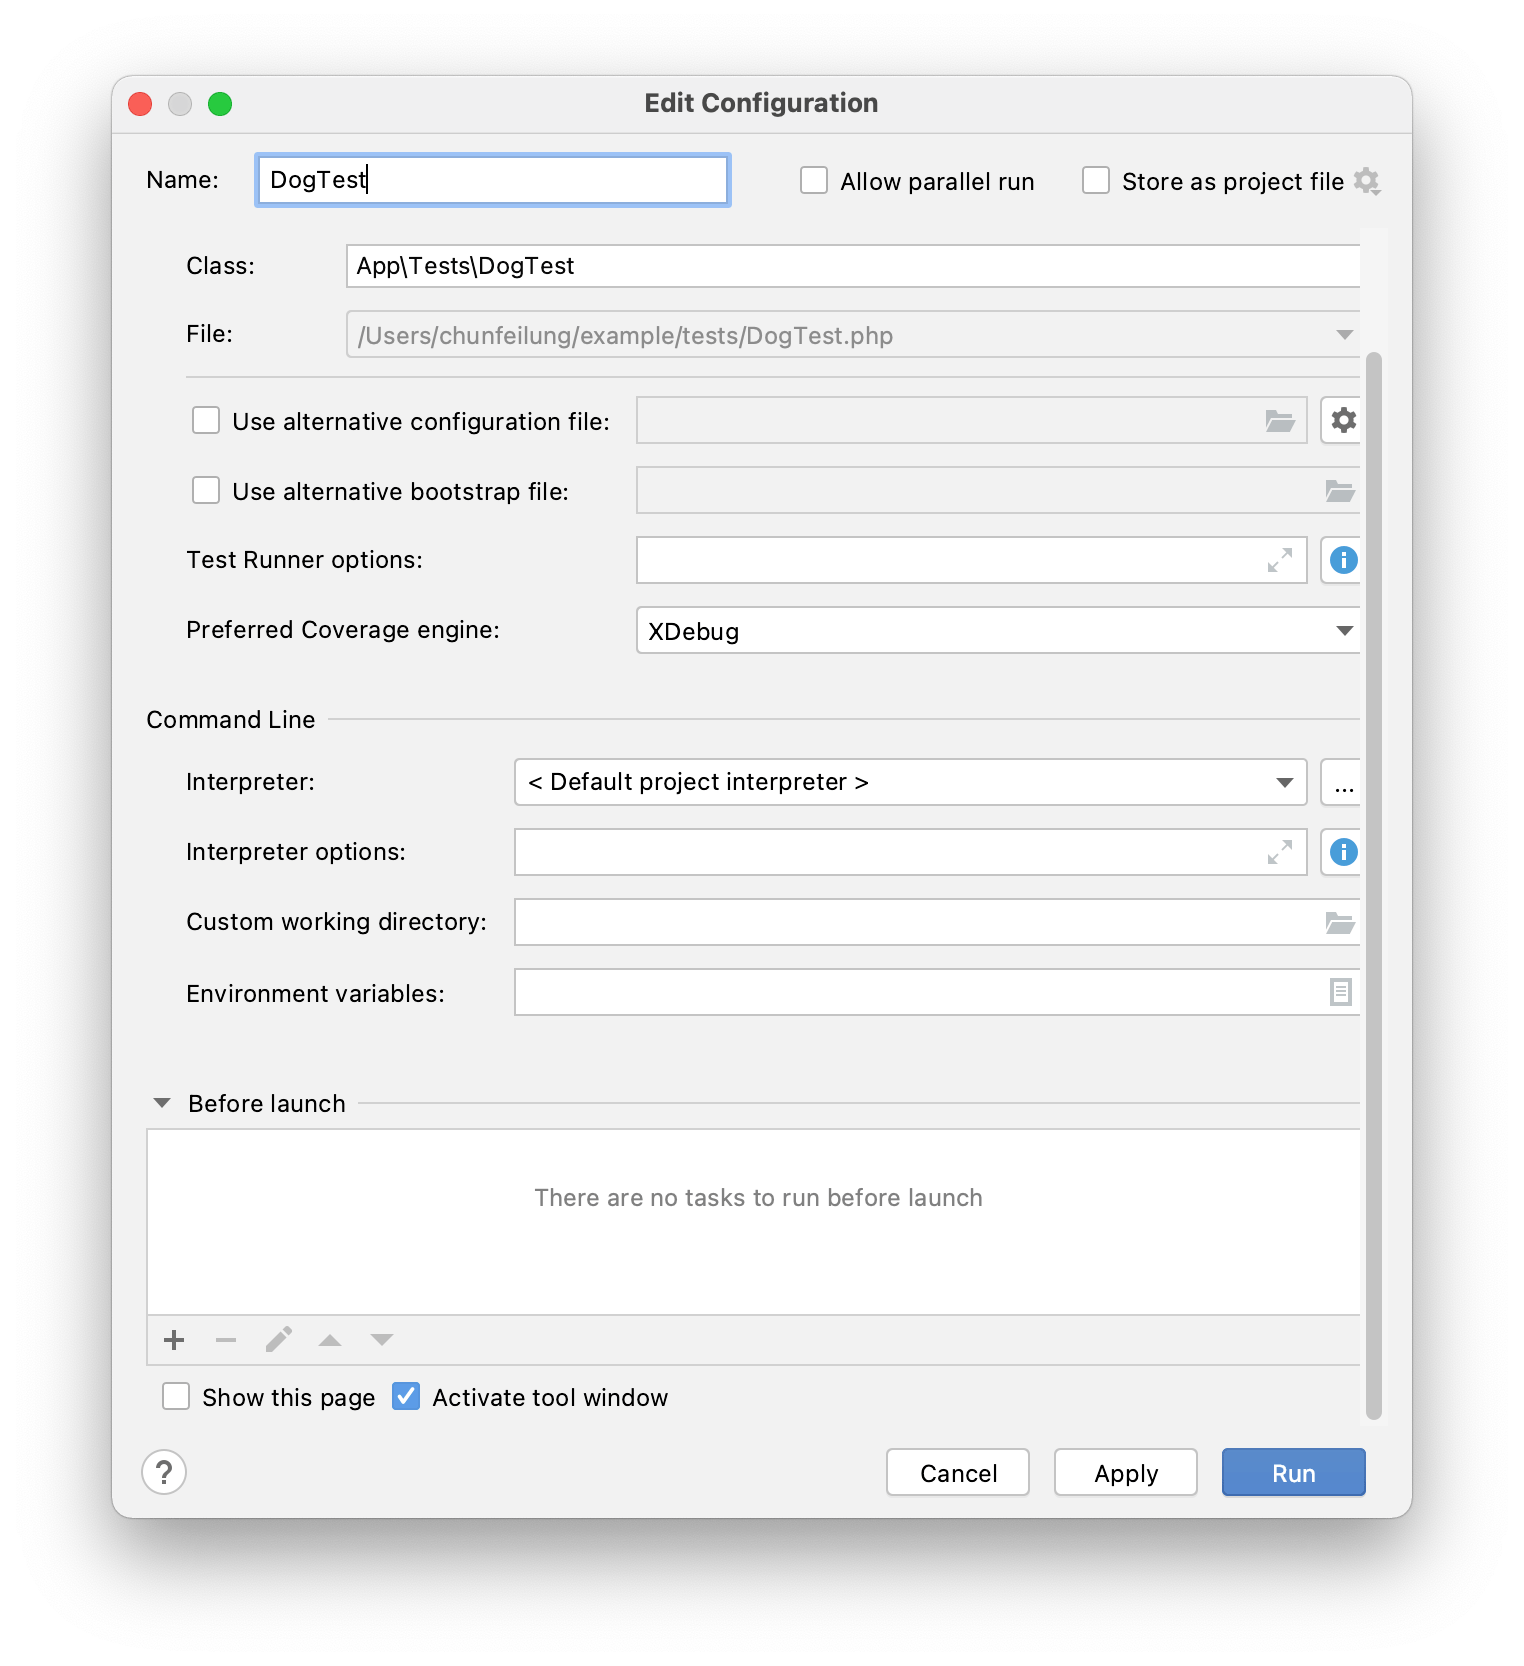
We’re now back in the “Edit configuration” window, except this time we no longer see an error message that tells us we need to fix things.
Press the “Run” button near the bottom of the window to run the tests.
If your project follows modern conventions, PhpStorm should be able to run your tests now!
Feel free to if you followed all the steps in this tutorial, but PhpStorm still refuses to run your tests.